How to hook up your home theater correctly — learn the guaranteed steps to install, connect, and optimize every component of your home theater system.
If you’ve ever wondered how to hook up your home theater without getting overwhelmed by cables, connections, audio formats, and calibration settings, you’re in the right place. Today’s home theater systems can deliver cinema-level picture quality and breathtaking sound — but only if they’re hooked up correctly. This complete, beginner-friendly guide walks you through a Guaranteed 7-Step Setup, helping you build a balanced, immersive home theater system that performs exactly the way it should.
Whether you’re using a high-end AV receiver or a simple sound system, this article will show you how to hook up your home theater properly, avoid common mistakes, and optimize everything from speaker placement to HDMI settings. Let’s get started!
Understanding Modern Home Theater Systems
Before learning how to hook up your home theater, it helps to understand the parts that make up a complete setup. Home theaters today are built around versatile components designed to work together.
Key Components of a Complete System
Most modern home theaters include:
- Display: TV or projector
- Audio system: Soundbar, 5.1, 7.1, or Dolby Atmos speakers
- Subwoofer: For deep bass and cinematic impact
- AV receiver: The “brain” that routes audio and video
- Streaming devices: Apple TV, Roku, Fire TV Stick, etc.
- Disc players or gaming consoles
Knowing what each piece does will help you understand how everything connects.
Common Home Theater Configurations
Typical setups include:
- Soundbar + Subwoofer (simple, entry-level)
- 5.1 Surround System (standard home theater)
- 7.1 Surround System (enhanced directional sound)
- Dolby Atmos System (premium, 3D audio with height channels)
Regardless of your system type, the connection principles remain the same.
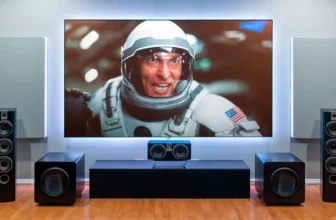
Step 1: Choosing the Right Display for Your Home Theater
A great home theater starts with the right screen.
TVs vs Projectors
TVs offer:
- Brighter images
- Better for daytime viewing
- Easy setup
- Great HDR performance
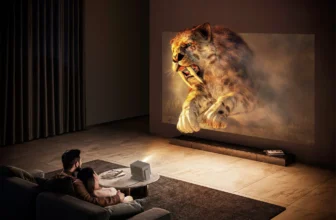
Projectors offer:
- Cinematic screen sizes (100″+)
- Best for dark rooms
- Immersive theater feel
Screen Size and Room Placement
General rules:
- Sit 1.5× the TV’s height away for best quality
- Place screens at eye level
- Avoid direct sunlight on the screen
Choosing the right display is the first step in mastering how to hook up your home theater effectively.
Step 2: Setting Up Your Home Theater Receiver
Your AV receiver is the command center.
HDMI Connections
Use:
- HDMI 2.1 for next-generation gaming (120Hz)
- eARC HDMI for movies with Dolby Atmos
- High-speed cables for 4K or 8K content
Your hookup should look like:
Devices → Receiver → TV
This ensures the receiver manages both audio and video.
Audio Decoding Formats
Your receiver should support:
- Dolby Atmos
- Dolby TrueHD
- DTS:X
- PCM
Enable “Auto” or “Bitstream” mode so sound plays in the highest quality.
Step 3: Connecting Your Speakers Properly
This step determines whether your movie sound is immersive or flat.
5.1 vs 7.1 vs Dolby Atmos Layouts
5.1 System includes:
- Left
- Center
- Right
- Two surround speakers
- One subwoofer
7.1 system includes all of the above + two rear channels.
Dolby Atmos systems include height speakers mounted above or using up-firing speaker modules.
Wiring and Calibration Tips
- Use speaker wire gauge 14–16 AWG
- Ensure positive and negative polarity is correct
- Run auto-calibration like YPAO, Audyssey, or MCACC
Correct wiring is crucial for anyone learning how to hook up their home theater successfully.
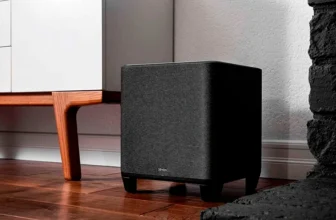
Step 4: Positioning Your Subwoofer for Best Performance
Subwoofers create the deep rumbling sound you feel in action films.
Optimal Subwoofer Placement
Best locations:
- Front corner of the room
- Along the front wall
- About 6–12 inches from the wall
Avoid putting it:
- In the exact middle of the room
- Against two corner walls
- Hidden inside cabinets
Avoiding Common Bass Mistakes
- Don’t turn the bass to maximum
- Avoid placing subwoofers behind couches
- Use the “subwoofer crawl” to find the best spot
Proper sub placement dramatically improves sound quality.
Step 5: Hooking Up Video Sources and Streaming Devices
Every video source needs to be routed through your receiver for seamless control.
Blu-ray Players, Gaming Consoles & Media Boxes
Use HDMI cables to connect:
- Streaming devices (Fire Stick, Apple TV)
- Blu-ray or 4K players
- PlayStation, Xbox, Nintendo Switch
Set your receiver’s input names to match your devices.
Cable Management Tips
- Use Velcro straps
- Label each cable
- Keep power and signal cables separated
This keeps your home theater clean and easy to maintain.
Step 6: Configuring Audio & Video Settings for Cinematic Quality
After hooking up your home theater, it’s time to optimize performance.
Picture Settings
For movies, set:
- Cinema Mode / Movie Mode
- Warm color temperature
- Motion smoothing OFF
- Local dimming ON
Sound Enhancement Settings
Enable:
- Dolby Atmos (if supported)
- Surround upmixers
- Dialog enhancement for clarity
Disable:
- “Dynamic Range Compression” unless watching at night
These small adjustments make a big difference.
Step 7: Testing, Troubleshooting & Fine-Tuning Your System
Your home theater is now connected — time to test it.
Common Setup Problems
- No sound → Wrong HDMI port (use eARC or ARC)
- Poor bass → Move subwoofer or adjust crossover
- Echo or hollow sound → Incorrect speaker distance settings
Final System Optimization
Run calibration again after final speaker placement.
Adjust audio delay (lip sync) until voices match the actor’s mouth movements.
At this point, you’ve fully learned how to hook up your home theater and optimize it like a pro.
Enhancing Your Home Theater Experience
Small touches elevate your setup.
Lighting, Seating & Room Acoustics
Consider:
- LED bias lighting behind the TV
- Acoustic panels
- Thick curtains
- Recliner seating
- Cable conduits and wall mounts
Your room’s environment matters just as much as the hardware.
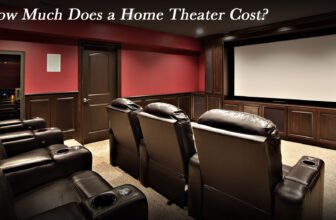
Cost Comparison of Different Home Theater Setups
Budget vs Mid-Range vs Premium Builds
| Level | Price | Components |
|---|---|---|
| Budget | $250–$500 | Soundbar, 50–55” TV |
| Mid-Range | $800–$2,000 | AV receiver, 5.1 speakers, 65” TV |
| Premium | $2,500+ | 4K projector, Atmos system, seating |
This helps you understand the long-term investment potential.
🟦 FAQs
1. What’s the best way to hook up a home theater?
Use HDMI connections through an AV receiver to route all audio and video properly.
2. Do I need an AV receiver?
If you want true surround sound, yes. Soundbars can work without one.
3. What size TV is best for a home theater?
Generally, 65 inches or larger for medium-sized rooms.
4. Does HDMI cable quality matter?
Yes — for 4K/120Hz or 8K setups, use certified HDMI 2.1 cables.
5. Where should I place surround speakers?
At ear height, angled toward the seating area.
6. Why is my subwoofer too loud or too quiet?
Adjust crossover settings (typically 80Hz) and experiment with room placement.
Conclusion
Learning how to hook up your home theater doesn’t have to be intimidating. With the Guaranteed 7-Step Setup Guide, you now understand every part of the process — from connecting HDMI sources to calibrating your speakers and optimizing your picture settings. Whether you’re building a simple soundbar setup or a full Dolby Atmos home theater, these steps ensure you get cinematic performance right in your living room.